Pavel Datsyuk End-to-End Goal: Dissected

Pavel Datsyuk End-to-End Goal: Dissected

Coaches' Corner, Defensive Zone, Neutral Zone, Offensive Zone, Philosophy, Team Systems
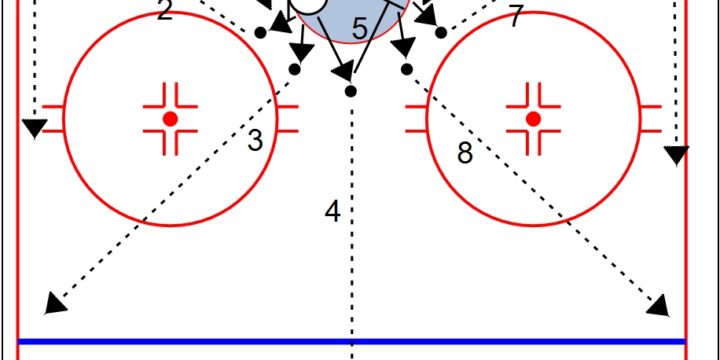
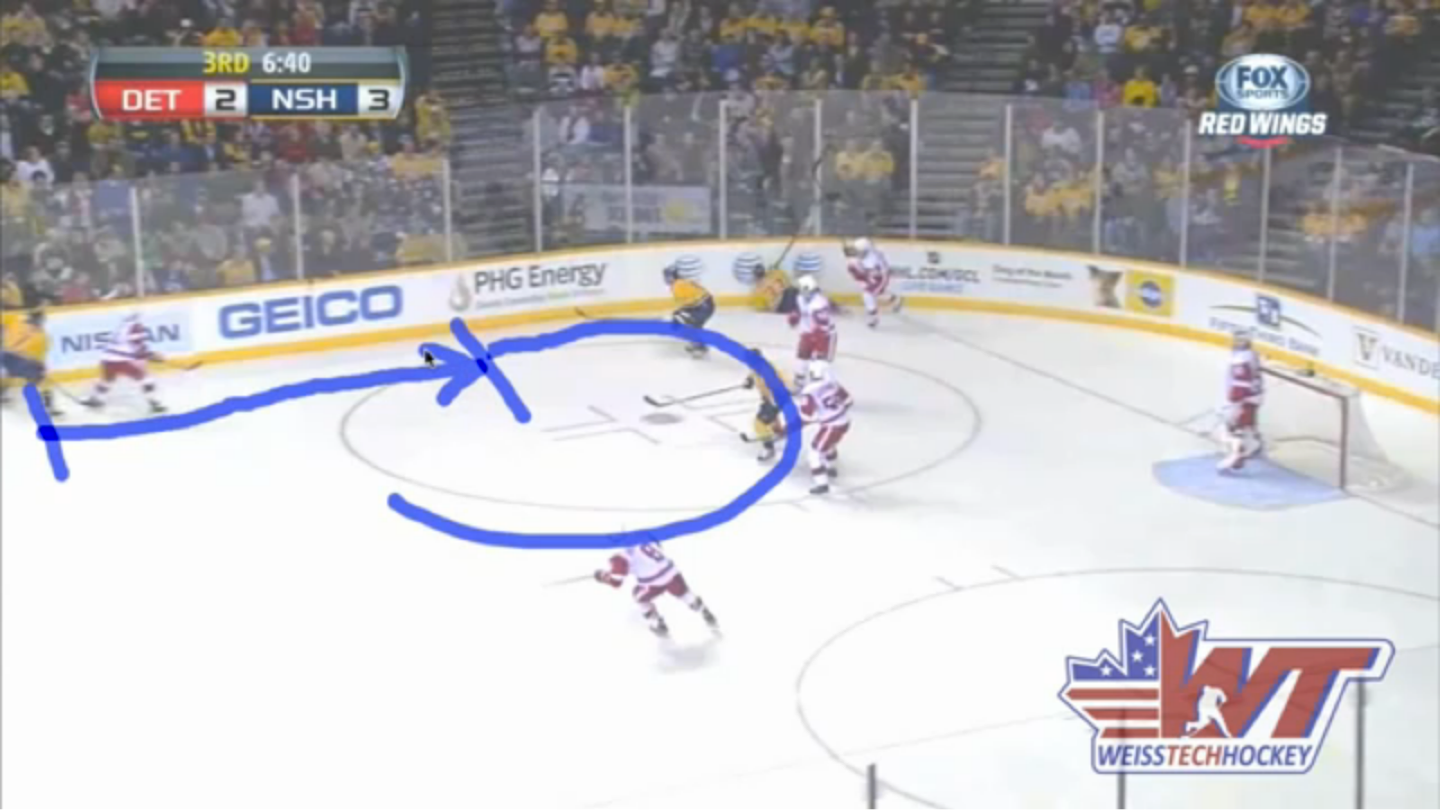
Pavel Datsyuk End-to-End Goal: Dissected In this post we're dissecting Pavel Datsyuk's end-to-end goal against Nashville. As great as the individual effort was, there are quite a few team details that really made this play possible. It starts with Datsyuk providing proper support for his defenseman in the defensive zone. He picks up the puck and initiates the breakout to the right winger. After making the breakout pass, he follows up the play, providing mid-lane support on the breakout. As the breakout is happening, the weak-side winger blows out of the zone, pushing the opposing defenseman back, which opens up space for Datsyuk to wheel. The play finishes with the opposing defenseman reaching for the puck, and Datsyuk eats him alive. Great individual effort, made possible by well-structured positional play.…
Read More

Neutral Zone: Swing Regroup

Neutral Zone, Team Systems
Use the Swing Regroup to create multiple passing options and to provide solid support through the neutral zone The Swing Regroup is a more advanced set-up for players who understand timing and support tactics, and can present themselves as passing options in multiple receiving zones. If your team is ready to learn this style of regroup, it can be extremely effective, and will set you up to enter the offensive zone with great positioning! If your team is younger, or less experienced, set them up on the "Post-Up" Regroup first, then work toward adding this one later on. Enjoy!
Read More

D-Zone Coverage: “Sagging” Zone

Defensive Zone, Team Systems
The "Sagging" Zone is a more aggressive defensive zone coverage set-up that will cause more turnovers than the less aggressive Box +1 In this video, we walk through the "Sagging" Zone set-up. I really like the risk level of this particular set-up. It is quite aggressive, but by dropping your weak-side winger down into the low slot, you can still maintain great coverage in front of the net. As players get more comfortable with this system, teach the weak-side winger to anticipate and pick off D to D passes, and cross-ice passes out of the corner. Good, quick wingers will see a lot of breakaways and 2 on 1's by reading these passes well. As is the case with the Box +1, "Sagging" Zone Coverage converts very well into a…
Read More

D-Zone Coverage: Box +1

Defensive Zone, Team Systems
Box +1 is an excellent introductory defensive zone coverage set-up I have used the Box +1 as an introductory defensive zone coverage set-up for a number of teams ranging from talented youngsters to beginner adults. The Box +1 is a great way to introduce structured defensive zone positioning, without a lot of risk. It is a passive system, which means it's very forgiving if a player makes a mistake (since you always have 4 players in front of the net!). The Box +1 also lends itself to progress into more complex coverages such as "Sagging" Zone Coverage, and the "Sagging" Zone Arrow. Furthermore, the transition from d-zone coverage to breakout is simple and straight-forward with this style of coverage. Enjoy!
Read More
Shuffle T-Pass

Shuffle T-Pass

Goalie, Half Ice Drills, Hockey Drills, Individual Skill Drills
The Shuffle T-Pass is a great drill to work on multiple parts of the goaltender's game. This drill works on positioning, proper rotation when moving around your crease, proper recovery from a butterfly, playing the puck, and crease awareness. Make sure your goalies don’t cheat in this drill. They should be squaring up to the puck, hugging posts, and get back to their proper post every time on the puck handling portion. Here are the diagrams: Shuffle T-Pass: Sequence 1 1. Shuffle from one side of the net to the other, stopping square to each puck, dropping to a reactionary butterfly at each puck 2. After arriving at the far post, come back the other way Note: Make sure to recover with the proper leg; right leg when going from…
Read More