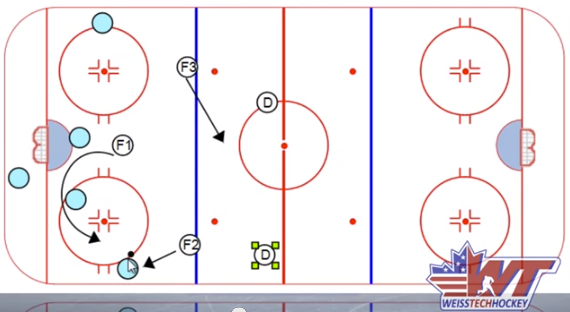

Stop the “Chip & Chase” Forecheck (The Aggressive 1-2-2)
https://www.youtube.com/watch?v=zHvqeFA9-WE If you are an aggressive team, the "Chip & Chase" is your worst enemy. We’ve all been there: You want to pinch your Defensemen to keep the pressure on. But the moment you pinch, the other team chips the puck past your D, wins the footrace, and suddenly the game turns into a track meet. It wears down your Defensemen and forces you to play "reactionary" hockey. Most coaches think the answer is to retreat into a passive Neutral Zone Trap. They are wrong. You don’t need to stop being aggressive. You just need to change where you apply the pressure. In this post, I’m breaking down the "Aggressive" 1-2-2 Forecheck and the simple adjustment that kills the chip & chase forever. The Mistake: The "Red Line" Wait In…